Installation
ProSchedule Install Instruction
Welcome to the ProSchedule installation page. It's much easier to install ProSchedule on your web server. It's not required to have the technical skill to install ProSchedule. You need to follow a few steps to install it on your server. You can choose any shared hosting, including cPanel or VPS server, which supports PHP and MySQL.
Server Requirements
Before installing ProSchedule, ensure your server meets the following requirements. PHP and MySQL have pre-installed all of the shared hosting providers by default.
PHP 7.4+
MySQL 5.7+
You check the PHP version if you write phpinfo(); on a PHP file. Also, you can ask your hosting provider if they support PHP 7.4+ or MySQL 5.7+.
You will also see a list with success and error icons on the installation screen about your server configuration.
Upload Files
Extract the downloaded archive package. You will see the following files after downloading the zip.
ProSchedule (folder) - this folder includes the main(script) files.
Documentation (folder) - this folder included documentation
readMe.txt (file) - here defined initial instructions regarding the script
Now, you must upload all files inside the ProSchedule folder to your website's root directory. You can use an FTP client or File Manager(cPanel/file management tool) to upload files.
An example video tutorial on uploading files on the cPanel hosting server
Create Database
Create a database for ProSchedule through your server control panel. If your server has phpMyAdmin, you can create a database using phpMyAdmin.
*** You can follow the following tutorial to create a new database in cPanel https://support.hostinger.com/en/articles/4548533-how-can-i-create-a-new-mysql-database-in-cpanel
Install
Now, go to your website address and you will see an installation wizard. You need to follow that wizard to complete the installation. Following are the steps you need to follow to complete the installation.
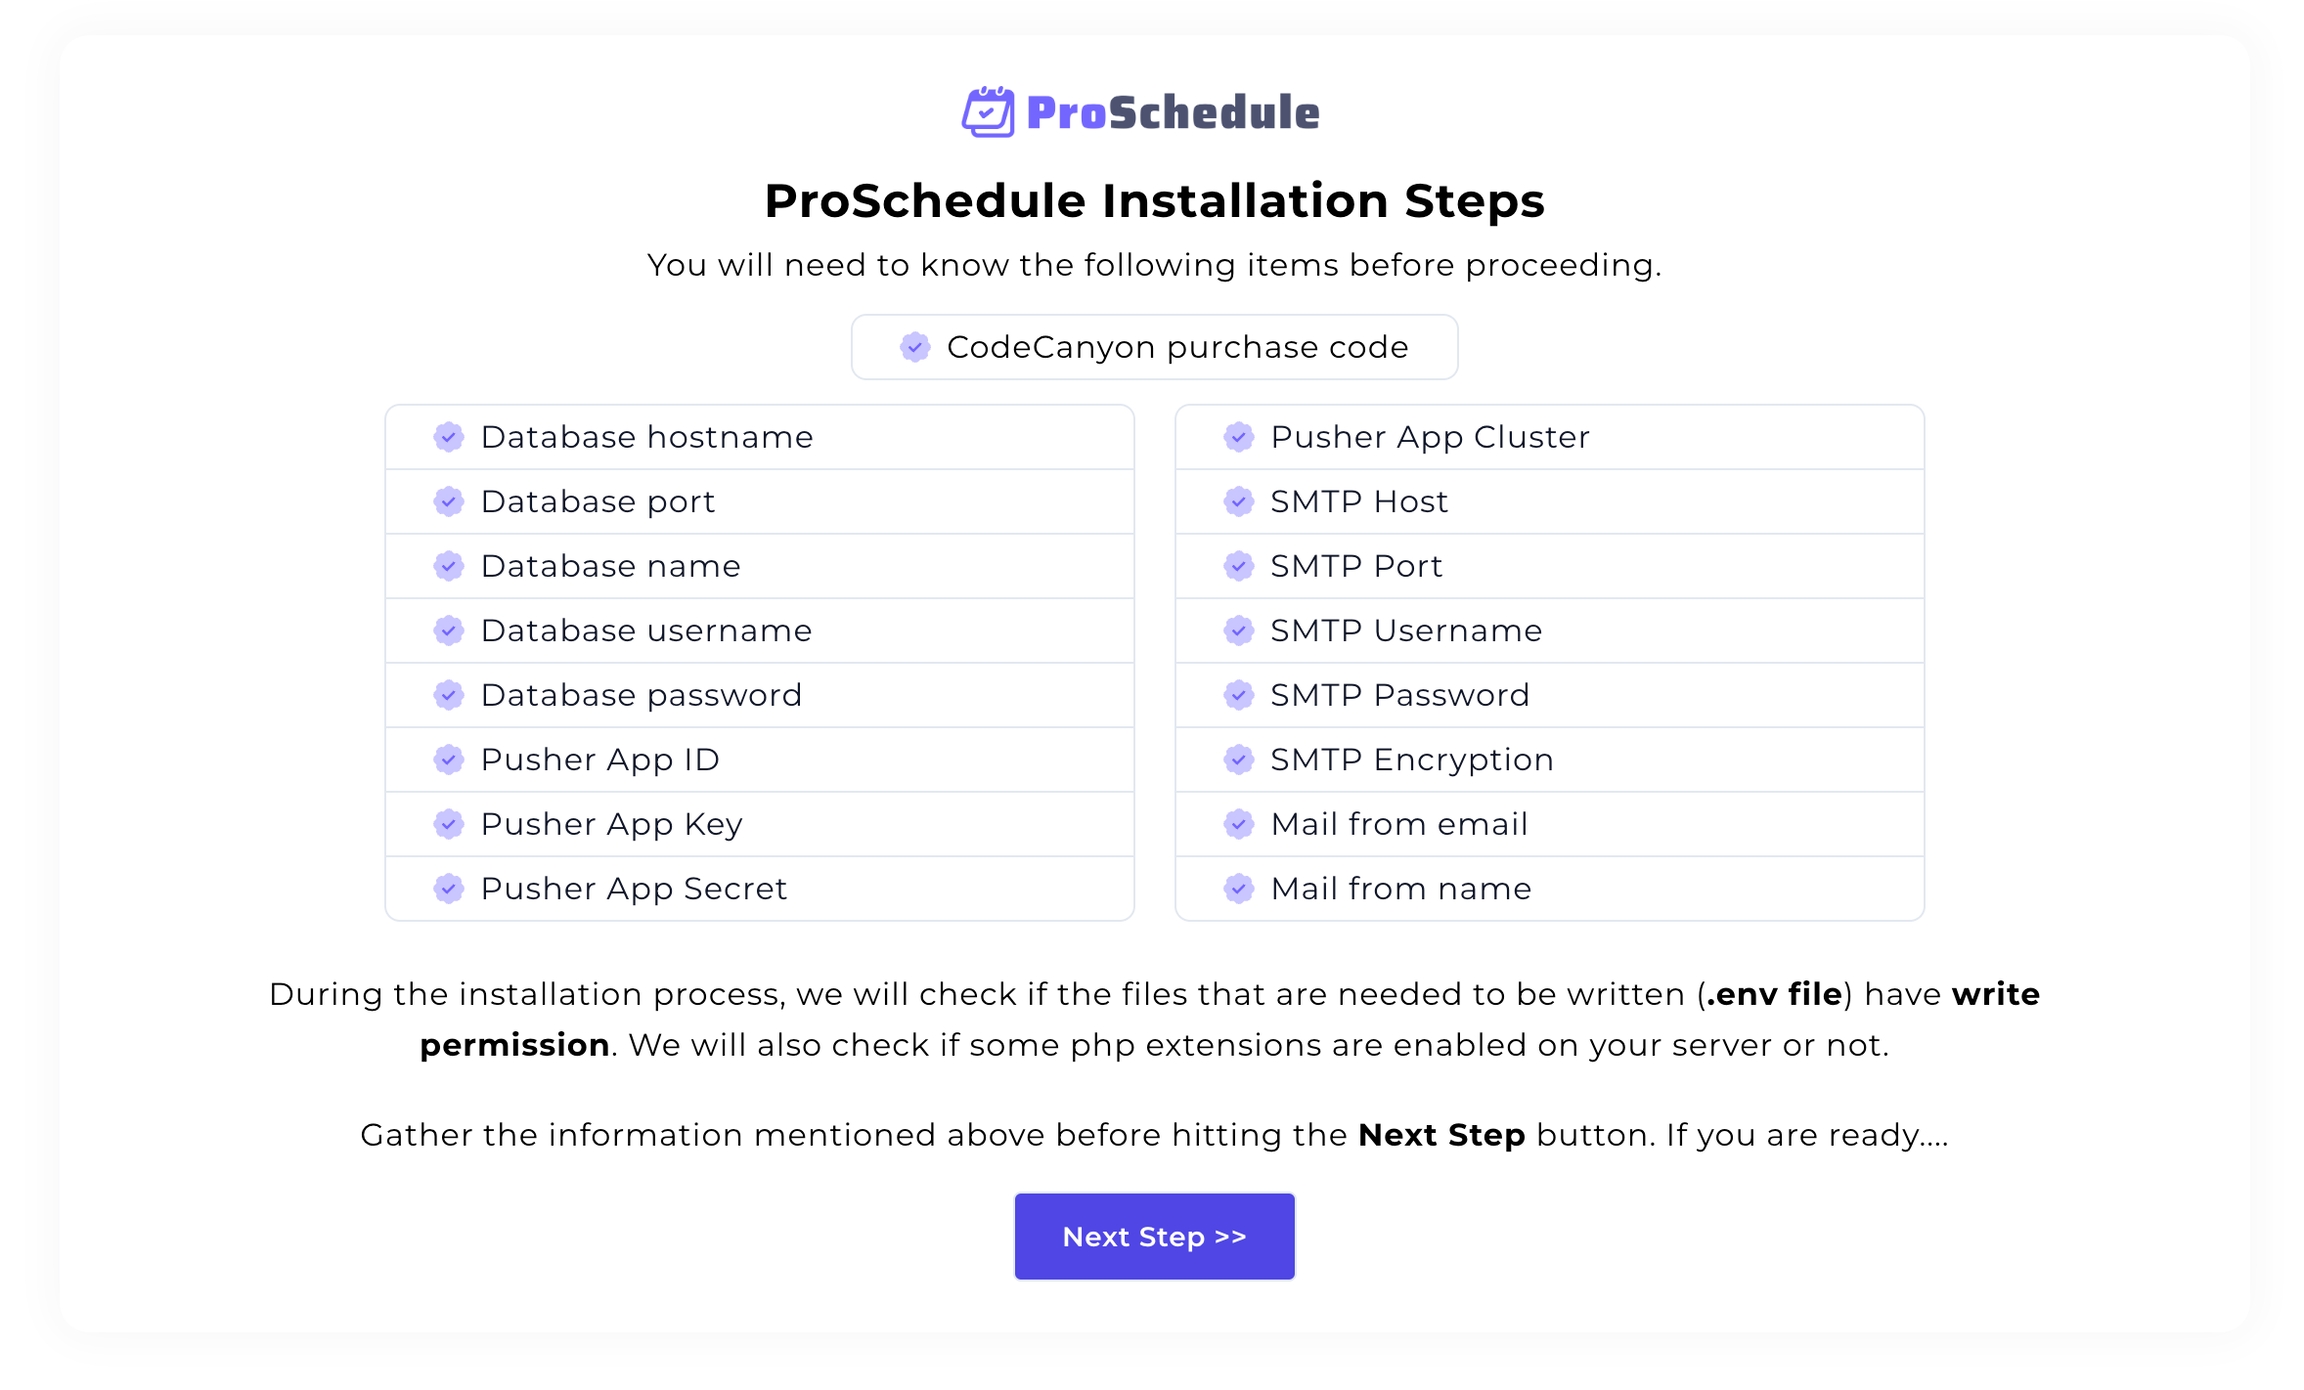
Installation Initialization
You will be asked for the following information while proceeding with the installation.
CodeCanyon purchase code
Database name, hostname, port, username, password
Pusher App ID, App Key, App Secret, App Cluster
SMTP host, port, username, password
You will see the following screen if you visit your website address. An example website URL as follow website.com
** Click on the “Next Step” button
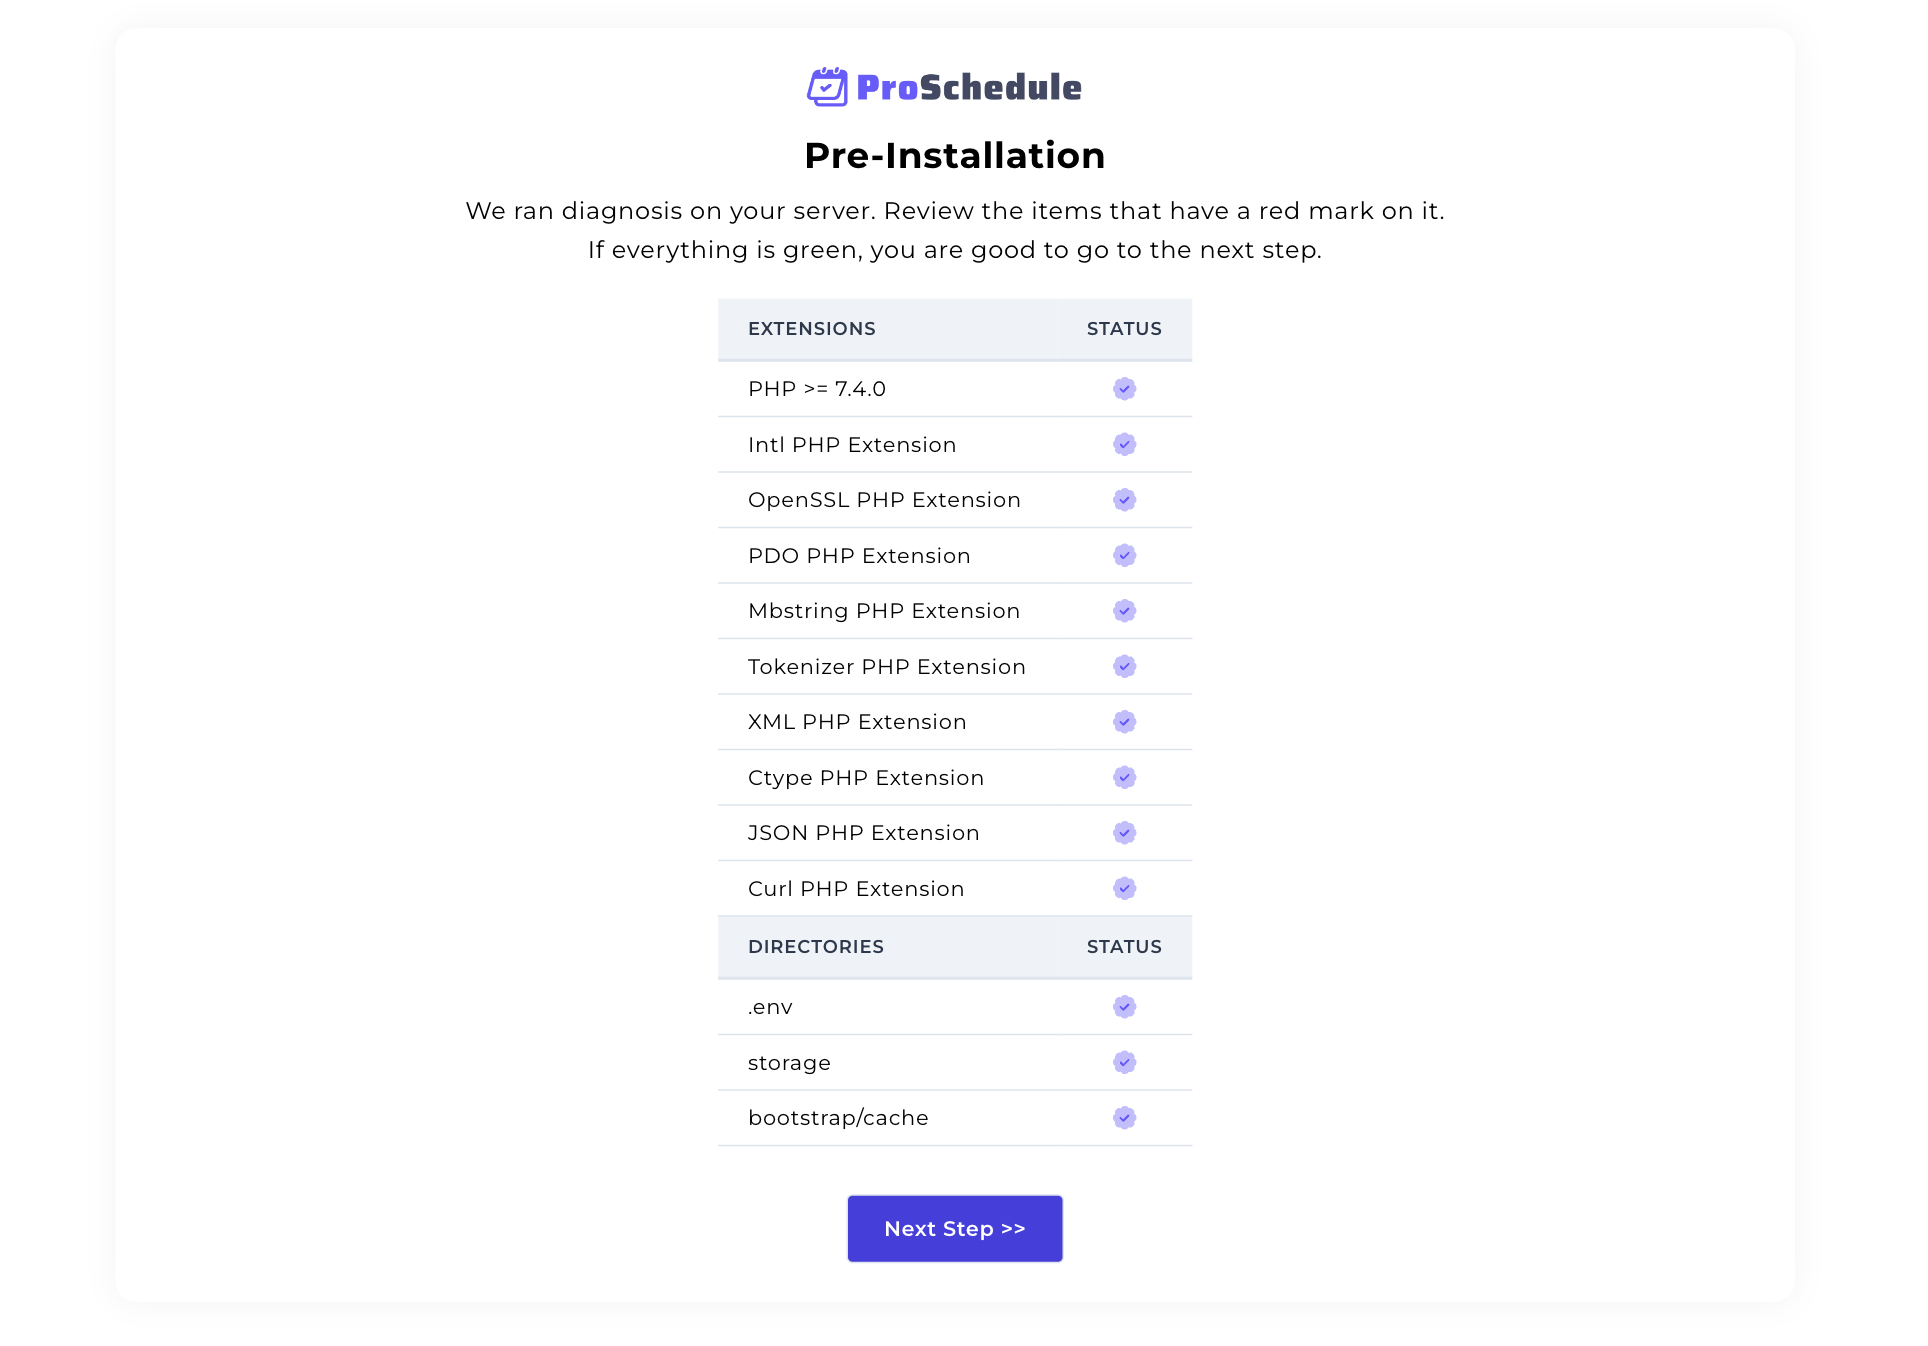
Checking Server Configuration
Pre Installation page checks if your server meets the requirements and has the correct directory permissions to set up ProSchedule.
Directories within the storage and the bootstrap/cache directories should be writable by your web server, or ProSchedule will not run.
In this step, we ran the diagnosis on your server. Please review the items that have a red mark on them. If everything is green, you are good to go to the next step.
** Click on the “Next Step” button
Purchase Code
Provide your CodeCanyon purchase code. You will find your purchase code where you downloaded the script file. You can go to this link also to know your purchase code.
https://help.market.envato.com/hc/en-us/articles/202822600-Where-Is-My-Purchase-Code
** Click on the “Next Step” button after submitting your purchase code
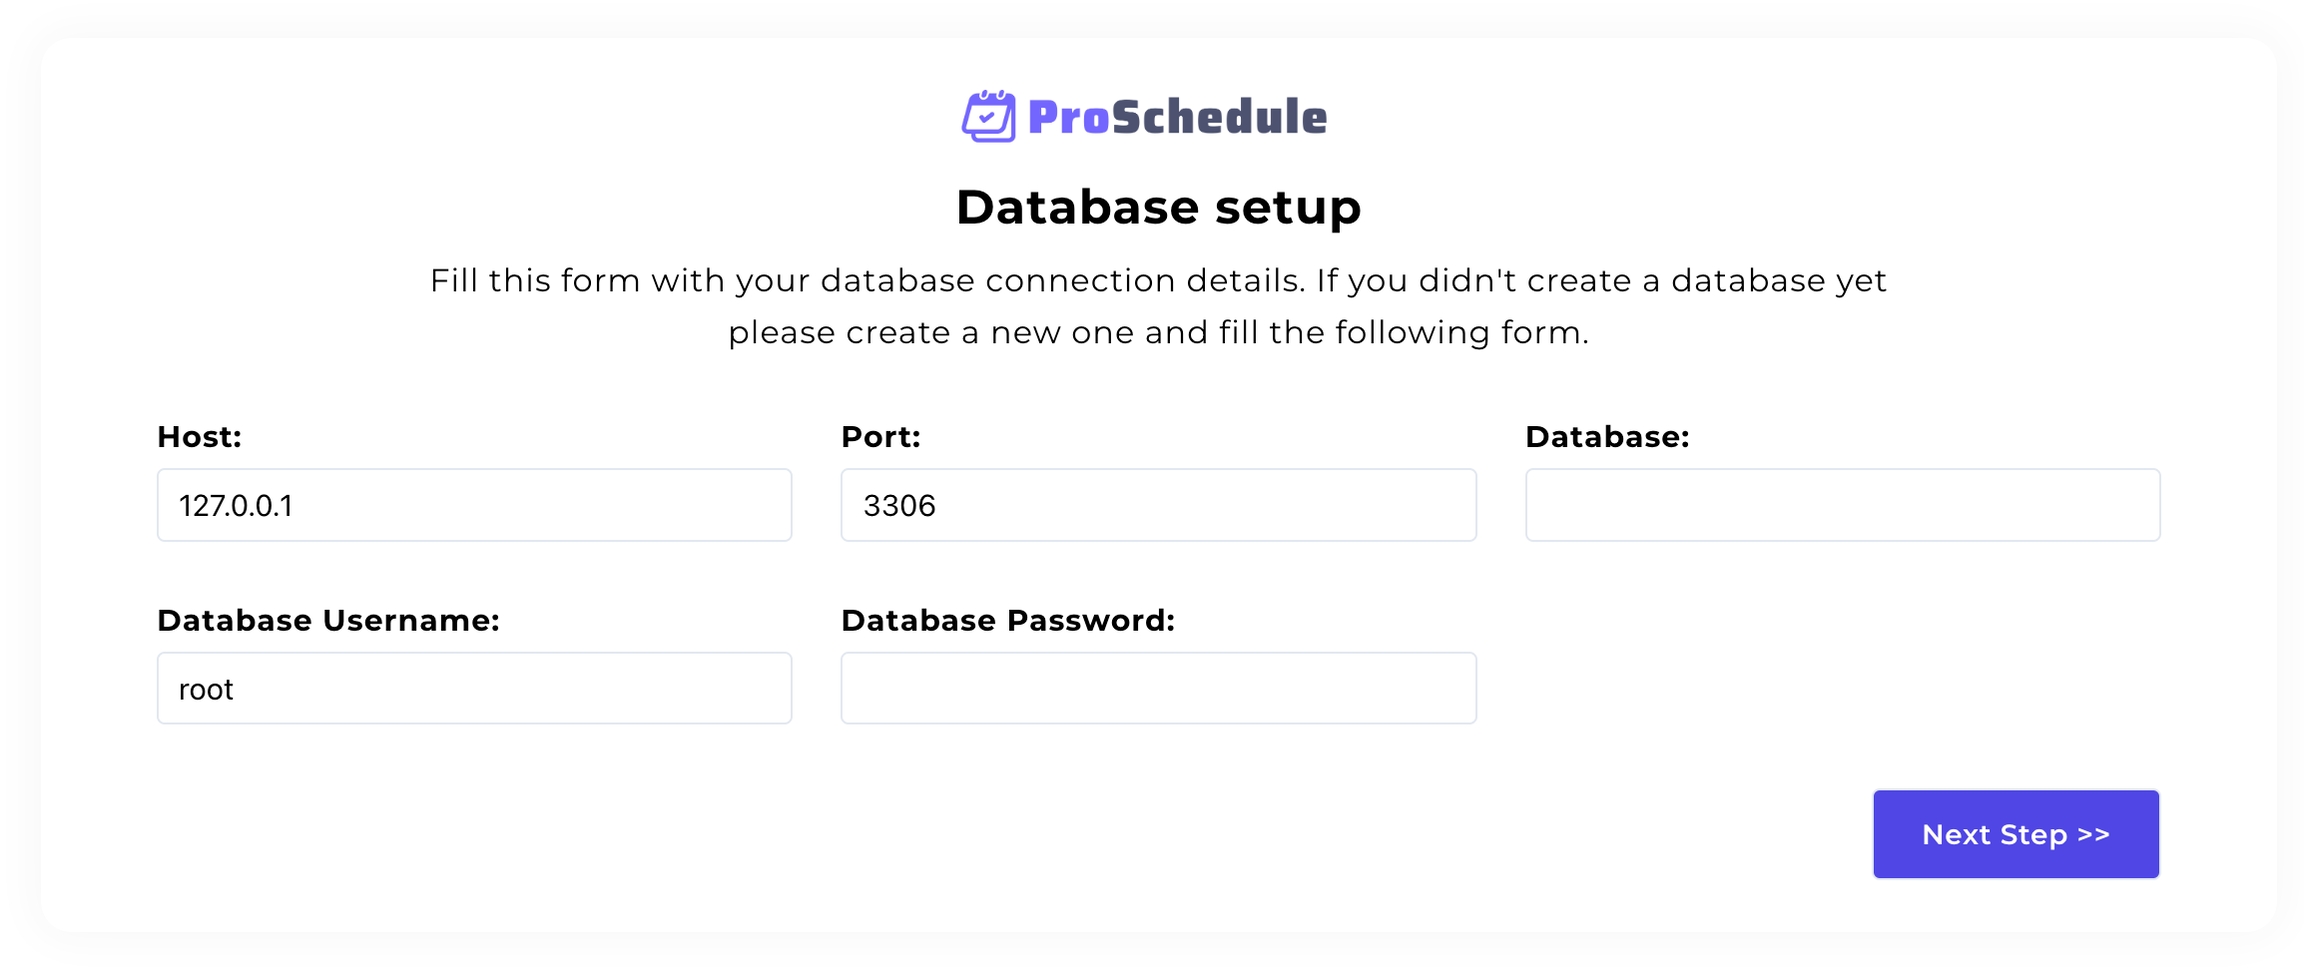
Database setup
Fill out this form with your database connection details. If you haven't created a database yet, please create a new one and fill out the following form.
Create a database for ProSchedule through your server control panel. If your server has phpMyAdmin, you can create a database using phpMyAdmin.
* cPanel – you can follow the following tutorial to create a new database in cPanel https://support.hostinger.com/en/articles/4548533-how-can-i-create-a-new-mysql-database-in-cpanel
** Click on the “Next Step” button
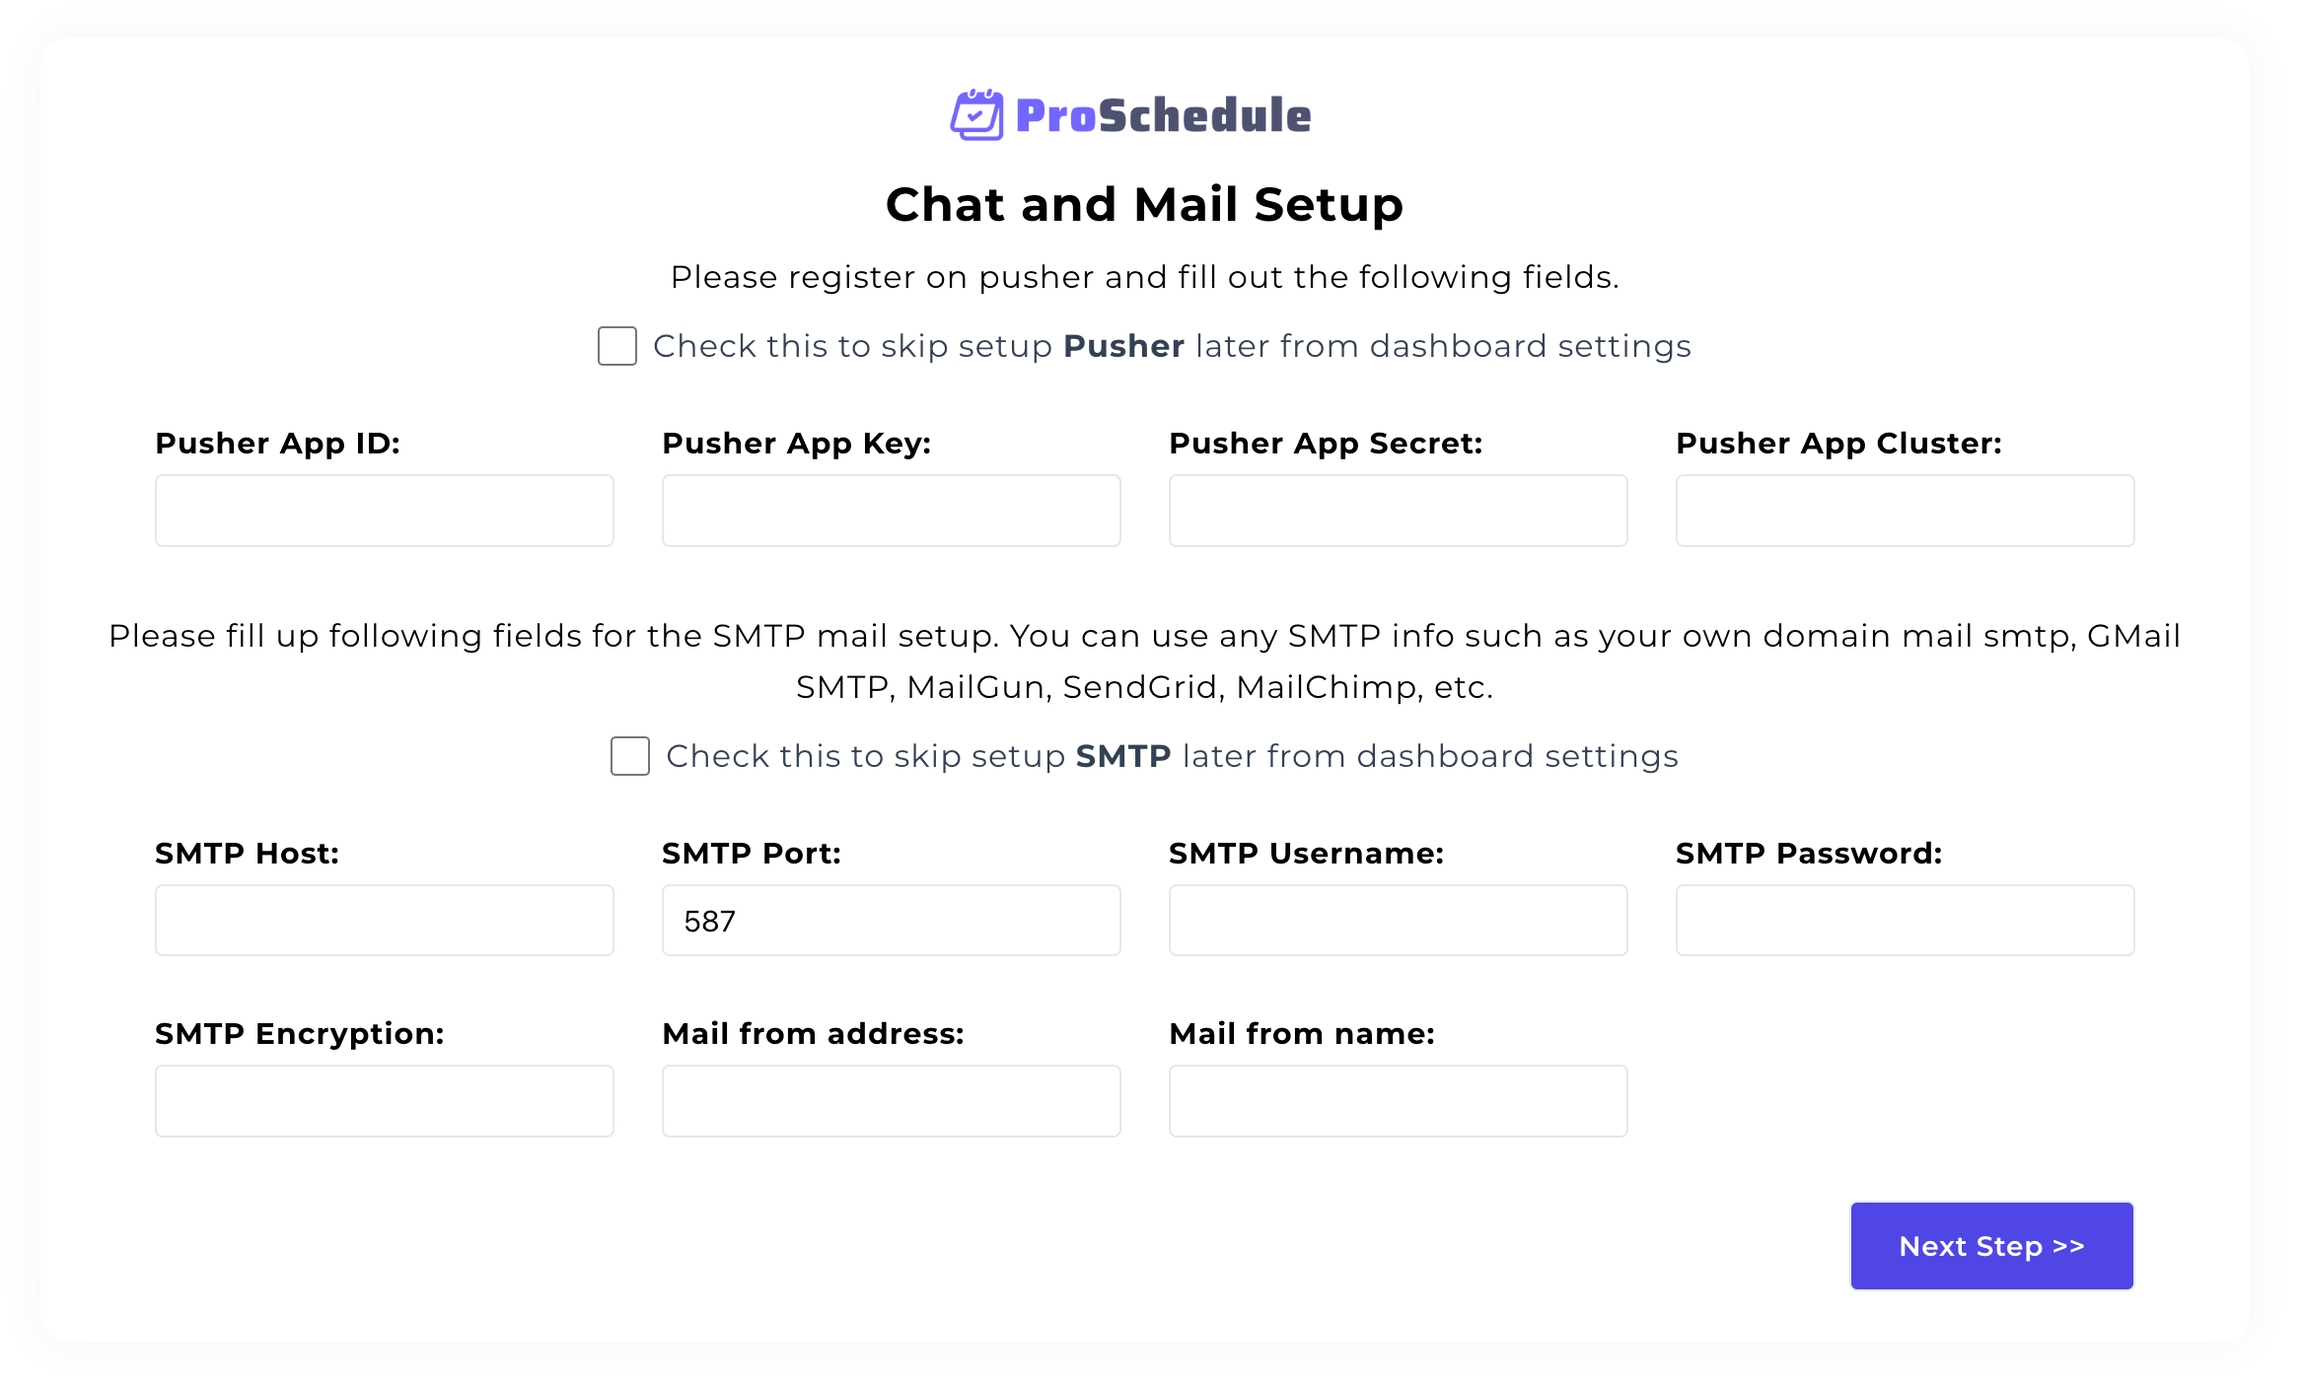
Chat and Mail Setup
Pusher will use to activate the chat functionalities. Please register on the pusher and fill out the pusher section fields. You can create a new pusher account easily from the following link below.
https://dashboard.pusher.com/accounts/sign_up
The following is a video tutorial about how to set up a pusher on the ProSchedule system.
Mail / SMTP configuration will use to send emails to the recipients. You can use any SMTP server, like your hosting email, Gmail SMTP info, etc. The following is an example link about how to get your hosting email account configuration.
** Click on the “Next Step” button
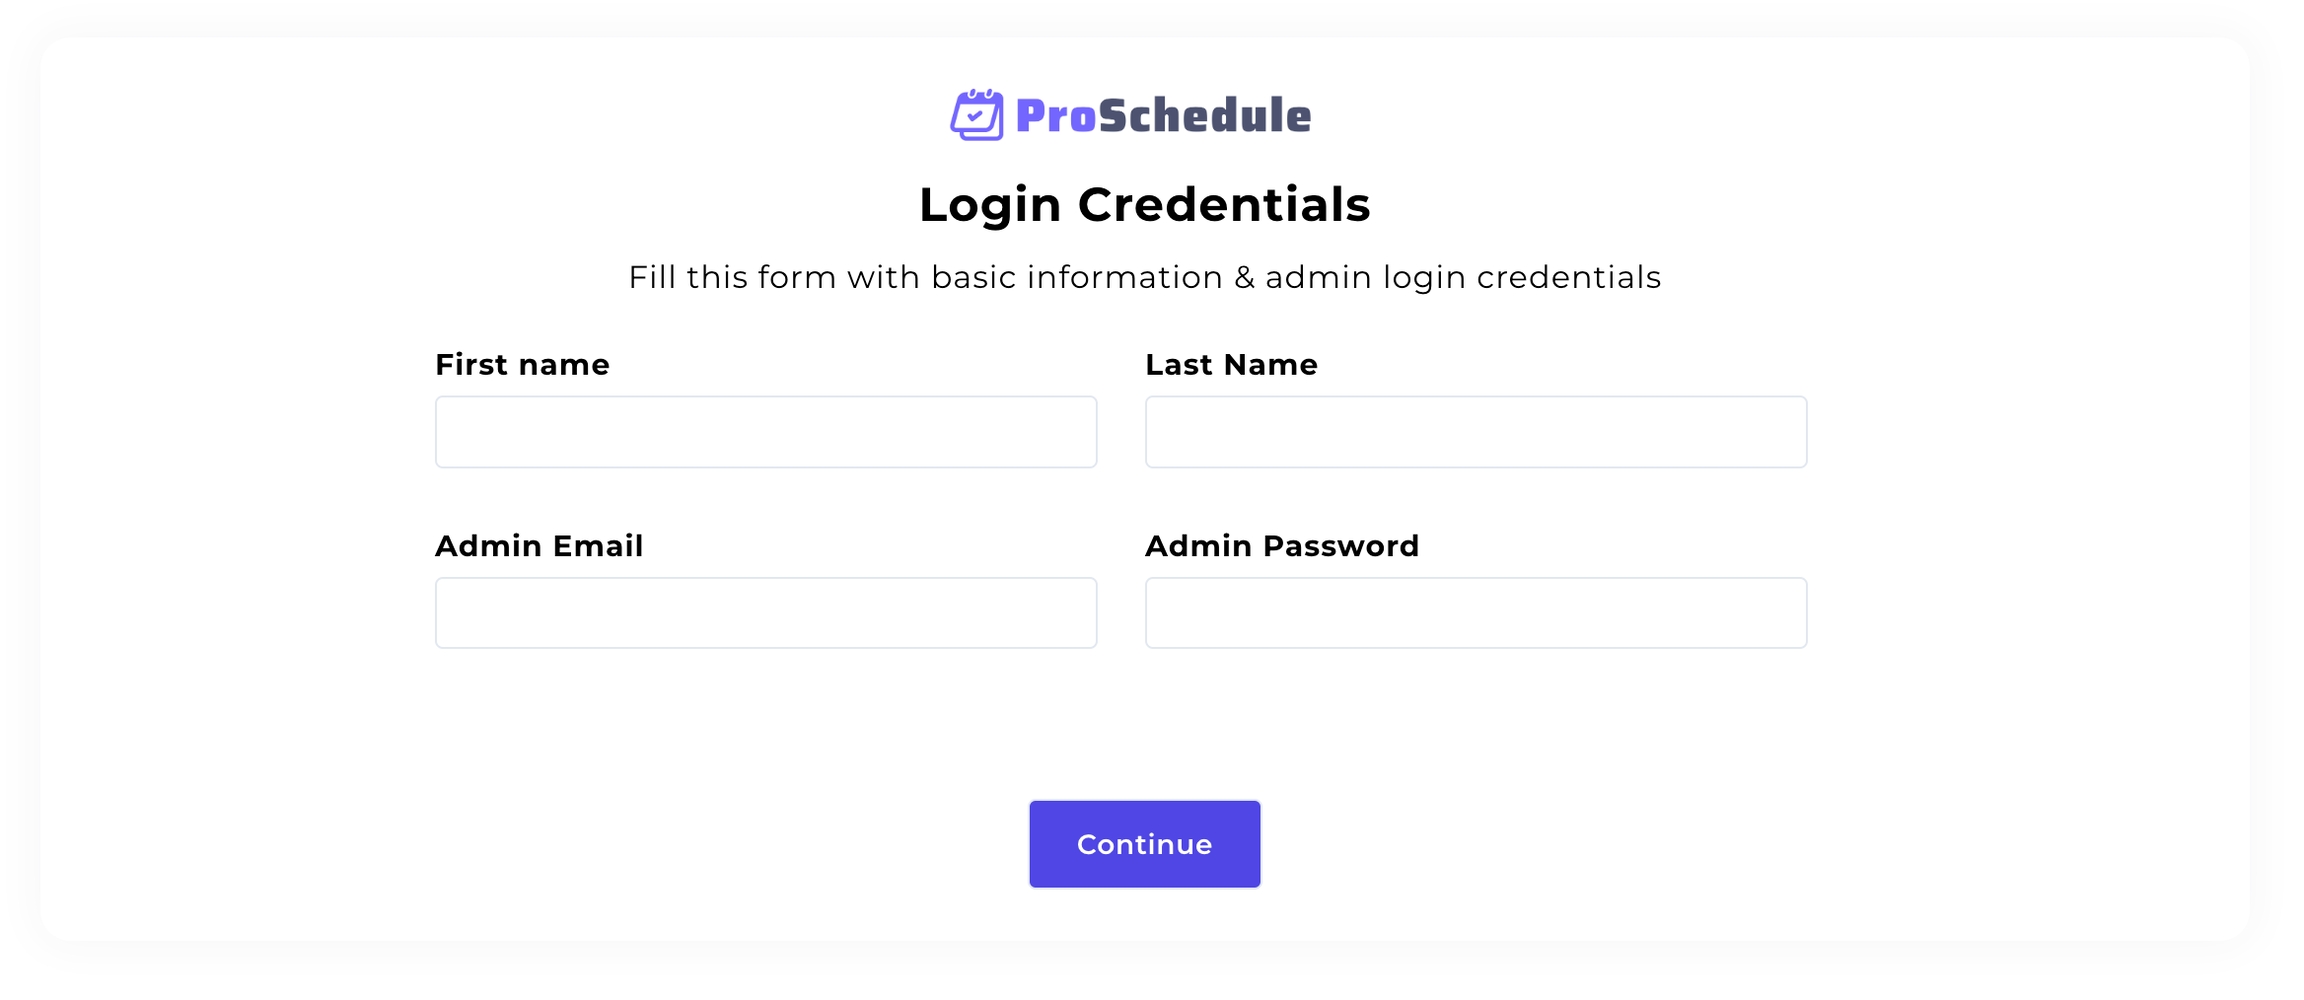
Login Credentials
In this step, you will need to set up your admin credentials to log in further to your App.
** Click on the “Next Step” button with filling up the input fields
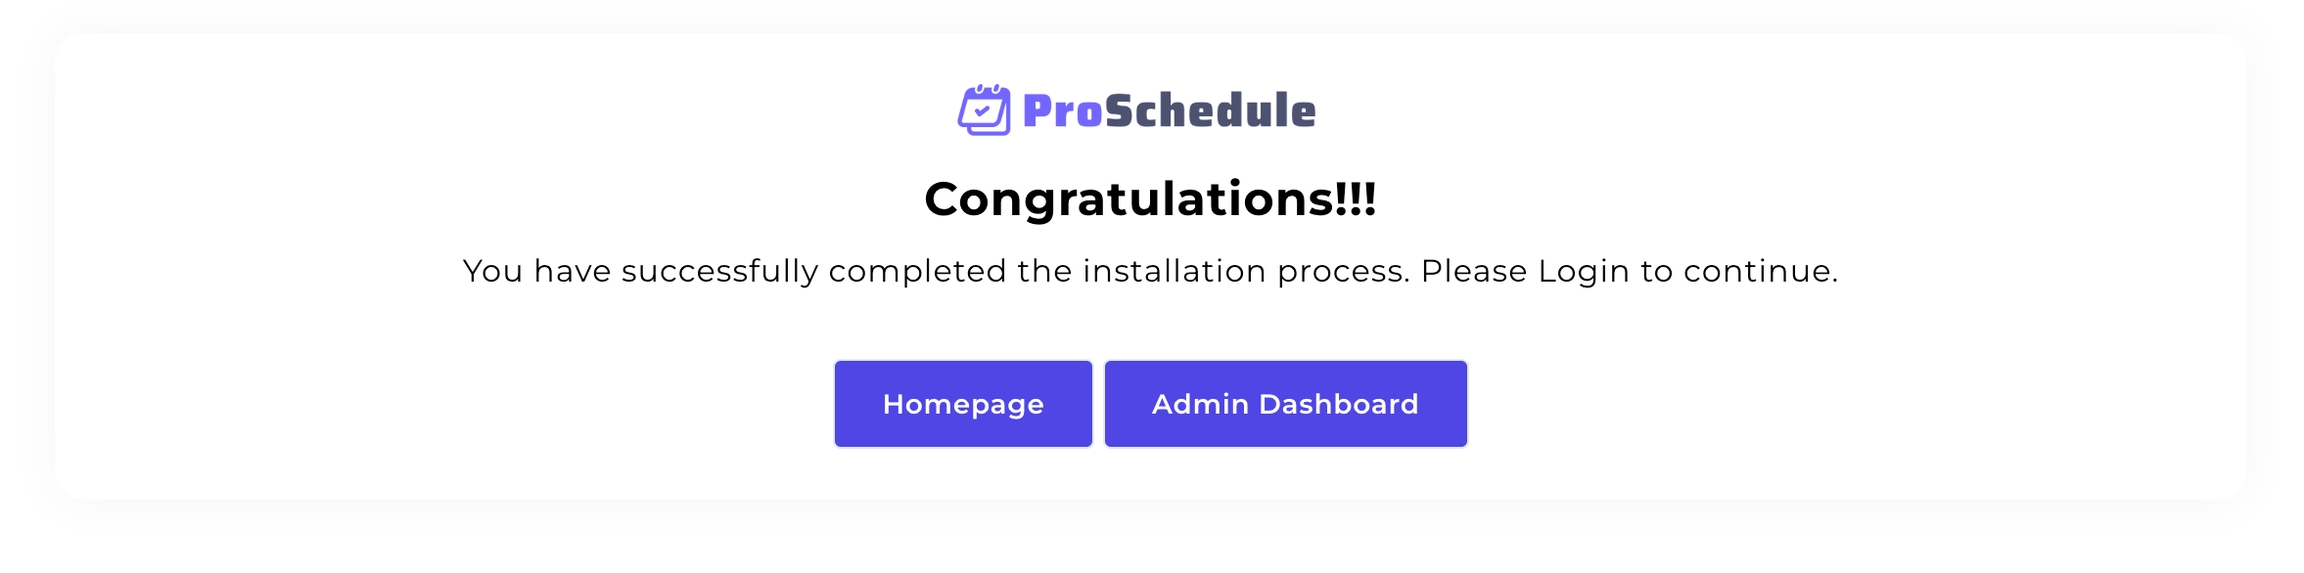
Complete Setup
Following the steps above, you are ready to run the application. You may need to wait a few seconds to complete database migrations and staff.
You will see the following screen after completing the setup.
** Your application is ready to use. You can visit now on HomePage or Dashboard.
Video Tutorial
You may watch the following tutorial to know the complete process of the ProSchedule script installation.
The above video is a complete tutorial about Installing ProSchedule on the cPanel or shared hosting.
Last updated